Original by Bruce Hirst
- Old clothes. When you paint your model, paint will end up spattering everywhere. Be sure to wear some old clothes that you don't mind getting paint on.
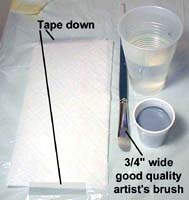
- Cover your work surface. Tape a trash bag down to the table, or use several layers of newspaper.
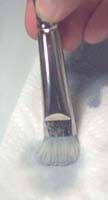
- Paint brushes. For the first coat of paint, I use a cheap 1" wide trim brush that you can find in the paint department of most stores. For the drybrushing and details, I use a good quality 3/4" wide artist's brush which you can find in the craft department of most stores.
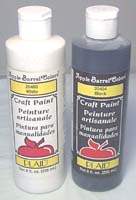
- Paint. I prefer to use flat latex exterior house paint because it will hold up the best during game play, but you can also use acrylic craft paint found in the craft department of most stores. If you end up using craft paint, you will not need to dilute it with water as much as the house paint.
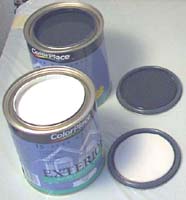
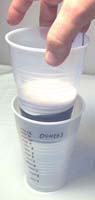
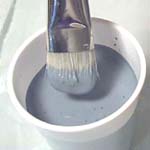
- Plastic cups and storage containers. You will need these to mix your paint and to save your left over paint for the next project.
- A reusable measuring cup. To make one of these, go to my Tips & Tricks 13 page.

You can also mail me a self addressed stamped envelope, and I'll send you back some color chips. You can take these chips to your local paint store and they can mix these colors for you exactly.

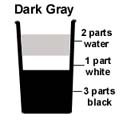
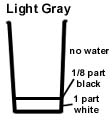
The formula for the gray color scheme is:
- Dark Gray- 3 parts black, 1 part white, 2 parts water.
- Medium Gray- 1 part black, 2 parts white, 1 part water.
- Light Gray- 1 part white, 1/8 part black, no water.
Scrape the side of the cup off using the inside of the paint can. This will keep the paint from dripping.
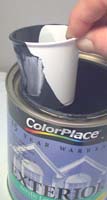
Pour the paint into a reusable measuring cup. To make one of these, go to my Tips & Tricks 13 page.
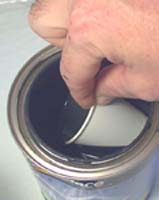
When you're finished dipping the paint out, you can set the cup onto the paint can lid if you need to use it again.
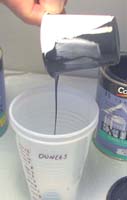
Lift the inner cup out of the measuring cup and mix the paint up. The paint will be thin because of the added water. Mix the paint thoroughly.


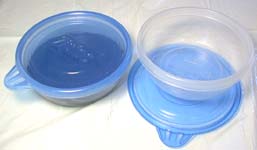
To store the mixed paint, I like to use disposable plastic containers. The containers shown here are from "Ziplock", but there are several other brands also.
These containers are cheap, hold a lot of paint and are much easier to open then baby food jars.
Painting the Dark Gray Base Coat
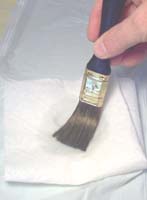
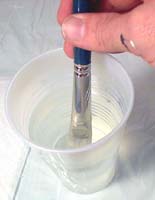
Before you begin painting, dip the brush up to the hilt in water. You want to get the bristles wet all the way up.
Next dab off the water with a paper towel. This will keep your paintbrush in good shape while painting.
If you do not wet the brush first, paint will creep way up into the bristles and dry there, making it difficult to clean and leaving your brush not as flexible.
Painting the Dark Gray Base Coat
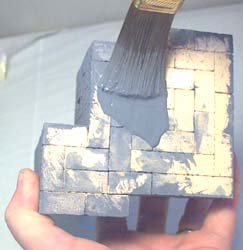
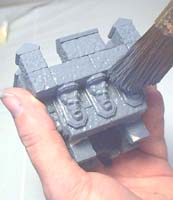
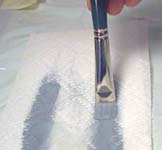
Dip the brush into the paint and slop it onto the model. You want the paint to run into all of the cracks and crevices between the blocks.
I suggest painting half of each piece and letting it dry. The glue I use (tacky glue) will soften up too much if you apply paint to the whole thing at once. I usually paint the bottom half first, setting the piece upside-down to dry.
Also, if you paint the whole item, it's harder to hold onto without getting paint everywhere, and it will stick to the table when you set it down.
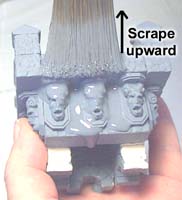
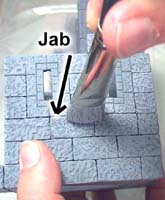
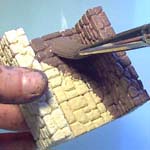
To paint deep detail such as the wizard's tower faces, start by slopping the paint on.
If you take a brush full of paint and scrape it across the top edge, paint will run down and cover the faces completely.
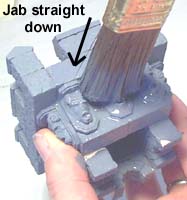
Next, jab the paintbrush down into the faces and all of the cracks. The paint will be thin enough to flow into all of the gaps and spaces.
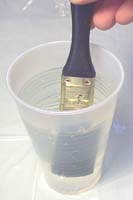
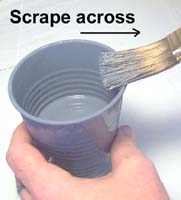
Since you don't want excess paint dripping or obscuring the detail, scrape the excess paint off of the brush. Place your brush on the edge of your cup and scrape across. You'll see excess paint run down into the cup.
Now jab the brush into the faces again, wipe up any drips and scrape the brush off again. Continue to do this until the excess paint is removed from the piece.
Do not stack your pieces together while the paint is wet! If you do, the paint will glue your model together and you'll never get it apart again.
After the paint dries, you might be thinking "Geez, this is way too dark!" But don't worry, it's supposed to be dark.

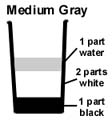
The formula for the Medium gray is:
1 part black - 2 parts white - 1 part water
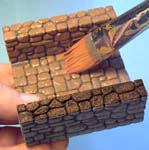
You'll want to tape a paper towel down to the table. Also, you'll need a good quality 3/4" wide artist's brush for putting on this second coat.
How you apply the second coat really makes a difference in how your model looks, so get a good brush for this.

Next you'll blot the excess water out using the paper towel. This will get the bristles wet all the way up into the handle.
If you don't wet the brush first, paint will get pushed way up into the bristles and dry there, ruining your brush.
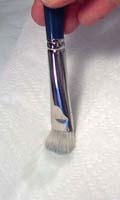
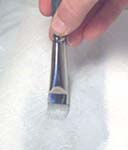
When dipping your brush, only dip the bristles halfway into the paint. This will help keep paint from drying way up into the bristles.
Wipe out the excess paint from the brush onto the paper towel. You want a very small amount of paint in the bristles of the brush.
Before you begin, test out your paint on the bottom of the model, or somewhere you won't see very well. This will give you a chance to see how the paint will look before you mess up a highly visible area.
If you can find an area with texture, the test will work a little better. The first few strokes always have more paint in them, and it's easier to get too much on the model accidentally.

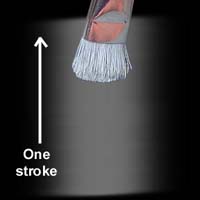
How dry brushing works.
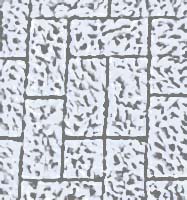
Compare the two photos here. Why does the one on the right look better than the one on the left?
The difference is dry brushing. If your second coat of paint is thick, you'll just have 2 shades of gray on your model, which will look like the left photo. The point is not to have two shades of gray, but to have lots of shades.
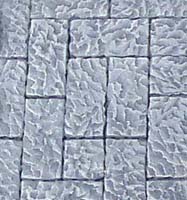
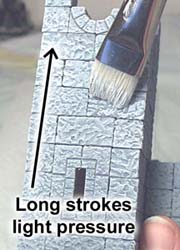
The trick to getting lots of shades of gray is to do a lot of brush strokes with very little paint on the brush.
When you do a single brush stroke this way, your color will end up darker because the dark color underneath will show through.
The more strokes you put down, the more variety of shades will happen.
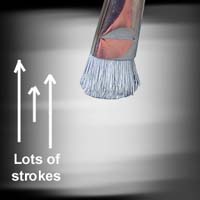
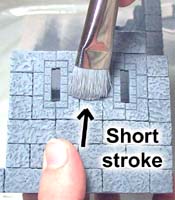
The technique I use is a quick jabbing motion. It's a cross between a jab and a stroke.
You want to pepper the surface with lots of short strokes, making sure there's very little paint on the brush. The more brush strokes you use, the more shades of gray that will appear.

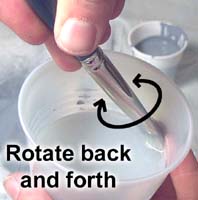
To clean the brush, dip it in water and rotate it against the side of the cup. Wipe out the brush and repeat this several times.
When finished, blot the excess water off and you'll be ready to paint again.
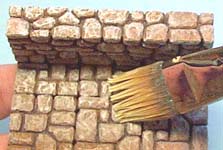
Painting the Final Highlight Coat
The formula for the Light gray is:
1 part white - 1/8 part black - no water.
The final coat of paint goes on much the same way as the second coat did. However, do not wet the brush before you start.
Dip the brush in the paint and then wipe the brush off almost completely. There will still be enough paint in the brush for the highlights.

This last coat will take very little paint, so if you mix more than 1 ounce, it will probably get wasted.
When you need to paint over deep details like the faces, be sure that the brush is almost empty of paint, then you can jab the brush down into the faces without putting too much paint on.
Finally, when you've finished this last coat, put the pieces of the tower together and compare the paint job of the separate parts. You may find that some parts may need more paint to make them match the rest of the model.
Earth Tone Painting Instructions
The paint colors for the earth tone color scheme are dark brown, medium orange-brown, and light cream.
If you would like me to send you a sample chip of each color, mail me a self-addressed stamped envelope or send me an e-mail when you place an order. Any place that sells paint can mix up a quart the exact color to match the samples.
Here are the colors from several different paint brands so you can mix up your own without needing the paint chips.

Mix it well and slop it on with a 1" wide brush. Be sure it runs into all the cracks (and there's a lot of them with these blocks). Use the same process shown in the Painting the dark gray base coat section on page 1.
The second color is the medium orange-brown. You'll want to add 1 part water to 3 parts paint. Dip the brush in the paint, wipe a good amount off on a rag and brush over the surface using a medium heavy pressure. The brush won't reach into the deep cracks which will remain dark brown.
Use the same process shown in the Painting the medium gray coat section on page 1.
The last color is a cream color. Dip your brush into the paint, then wipe most of it off on a paper towel, then lightly brush over the stone.
Don't try and rush this last step! More brush strokes with very little paint in the brush looks much better than a few brush strokes with lots of paint. Use the same process shown in the Painting the final highlight coat section on page 1.
Geen opmerkingen:
Een reactie posten