
Original by Suzanne Hogan ©2002 Text and Pictures
Supplies:
- Transparent Liquid Sculpey
- Black clay
- Paints to tint TLS
- Wire- fine for hooks and heavier for mobile
- Clear quilting thread or fine fishing line
- Needle nose pliers
- Piece of glass for work surface
- Tinfoil
- Pencils or dowels

Step 1: Find or draw a pattern (Figure 1 - left. Click for a larger view). The wings should be drawn separately. A wingspan smaller than 4 inches across works best. I based my butterflies on species native to my county. Place the pattern under the glass.
Step 2: Roll or extrude from your clay gun a long thin string of clay. Outline each wing with the clay. Bend a small piece of thin wire into a staple shape and embed it in the inner portion of each wing outline with the points facing the area where the body will be attached (Figure 2 - right). These will hold the wings in place after baking.

Step 3: Mix the liquid sculpey into the desired colors using small amounts of paint. I found it easiest to work with each color in a separate small squeeze bottle.
Step 4: Fill in each wing outline with the appropriate colors (Figures 3 and 4 - right. Click for a larger view). Be sure to fill in the whole area outlined with no gaps. Using a needle tool or toothpick to slightly feather the area where colors meet breaks the harsh lines and gives a more realistic effect. Another interesting effect can be achieved by making lines of colors inside each wing and dragging a needle tool or toothpick through the colors from the outside to the inside area.


Step 5: Bake the wings on the glass for approximately 20 minutes at 275 degrees. Allow the wings to cool before removing from the glass.
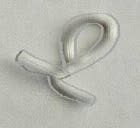
Step 6: Form a small log of clay for each butterfly's body . Make a small loop of wire and embed it into the top center of the body. This will be the hook to hang your butterfly

Step 7: Attach the wings to the body in a nice V shape (Figure 7 - right. Click for a larger view). Use pencils or dowels to support the wings. Be sure to embed the staple shape ends securely in the body. For larger wings, use tinfoil to support the wings on top of the pencils so that they will not droop during baking (Figure 8 - right. Click for a larger view). You may want to use small pieces of clay to anchor the pencils in place.


Step 8: Rebake the butterflies at 225 degrees for 20 minutes. Allow to cool.
Step 9: Form the mobile rods from the heavier wire (Figure 9 - right. Click for a larger view). I used four wires to support six butterflies. Make sure to include an upper hanging loop as well as side holding loops. The upper rod should be the largest, with the lower rods differing in size.

Step 10: Attach clear thread to each butterfly. Check to see that each butterfly balances on its string. Adjust the size, shape, or position of the wire loop holding the butterfly if necessary.
Step 11: Assemble the mobile with clear thread (see pictures below - click each for a larger view). Each piece should balance. You can adjust the lengths of the string and the lengths of the rods to achieve balance. Enjoy!


Geen opmerkingen:
Een reactie posten